Our backyard was in shambles when we got this house 5 years ago.
Bit by by bit, we've been improving things, working from the back of the yard, towards the house.
Before we started on the deck, I had a company bury our electrical and internet lines to the house. It costs to have the company bore the tunnel, but not trenching was really nice, and it also saved the lawn.
Now to the deck.
We elected for cedar. Mostly because it handles the outdoors well while being a pleasant softwood material. I like how it feels barefoot, it smells great, and its just a fun wood to work with.
My biggest goals were to have it be simple, seamless and straight. One of those decks that sorta blends into the larger landscape and is easy to access from multiple points.
I had to keep the deck low to the ground for privacy reasons. Since our street is sloped, its pretty easy to see into the neighbors yards. This low-to-the-ground detail presented some challenges that required alot of digging and workarounds.
 |
| Electrical now connects from back of garage to pole, shooting underground to house. |
 |
| Looking out from the backdoor, you can see post holes and some trenches for the beams. |
 |
| Looking towards the house from back of yard, notice the concrete steps to the house. |
 |
| Lots of strings helped me visualize the size of the deck and where to dig holes for posts. |
 |
| Once I was ready, I poured water into the hole and added concrete, stirred with a compost mixer. |
 |
| Don't use twine for strings, as they quickly lose their tension and/or break. Use the pink mason string. |
 |
| Progress with a few posts and metal fixtures attached. |
 |
| All the posts supports poured and ready. |
 |
| I had to level the stoop's last step as it was going to support the decking. This also told me how low I could get to the ground. |
 |
| I started laying beams with the corner that required the most digging and worked my way out. |
 |
| Framing around fence and stoop. There was lots of improvising working around the old stairs. |
 |
| I added gravel when the wood was close to the ground. |
 |
| Framing and joists done, now to the decking - the fun part. |
 |
| The trick to straight planks is starting with a good straight end piece and being patient. Each piece has a slight bow, so you need to pull and push ever so slightly to stay even across the deck. We used a wonderbar and a long wood clamp to pull the decking together when necessary. |
 |
| Instagram version of deck. |
 |
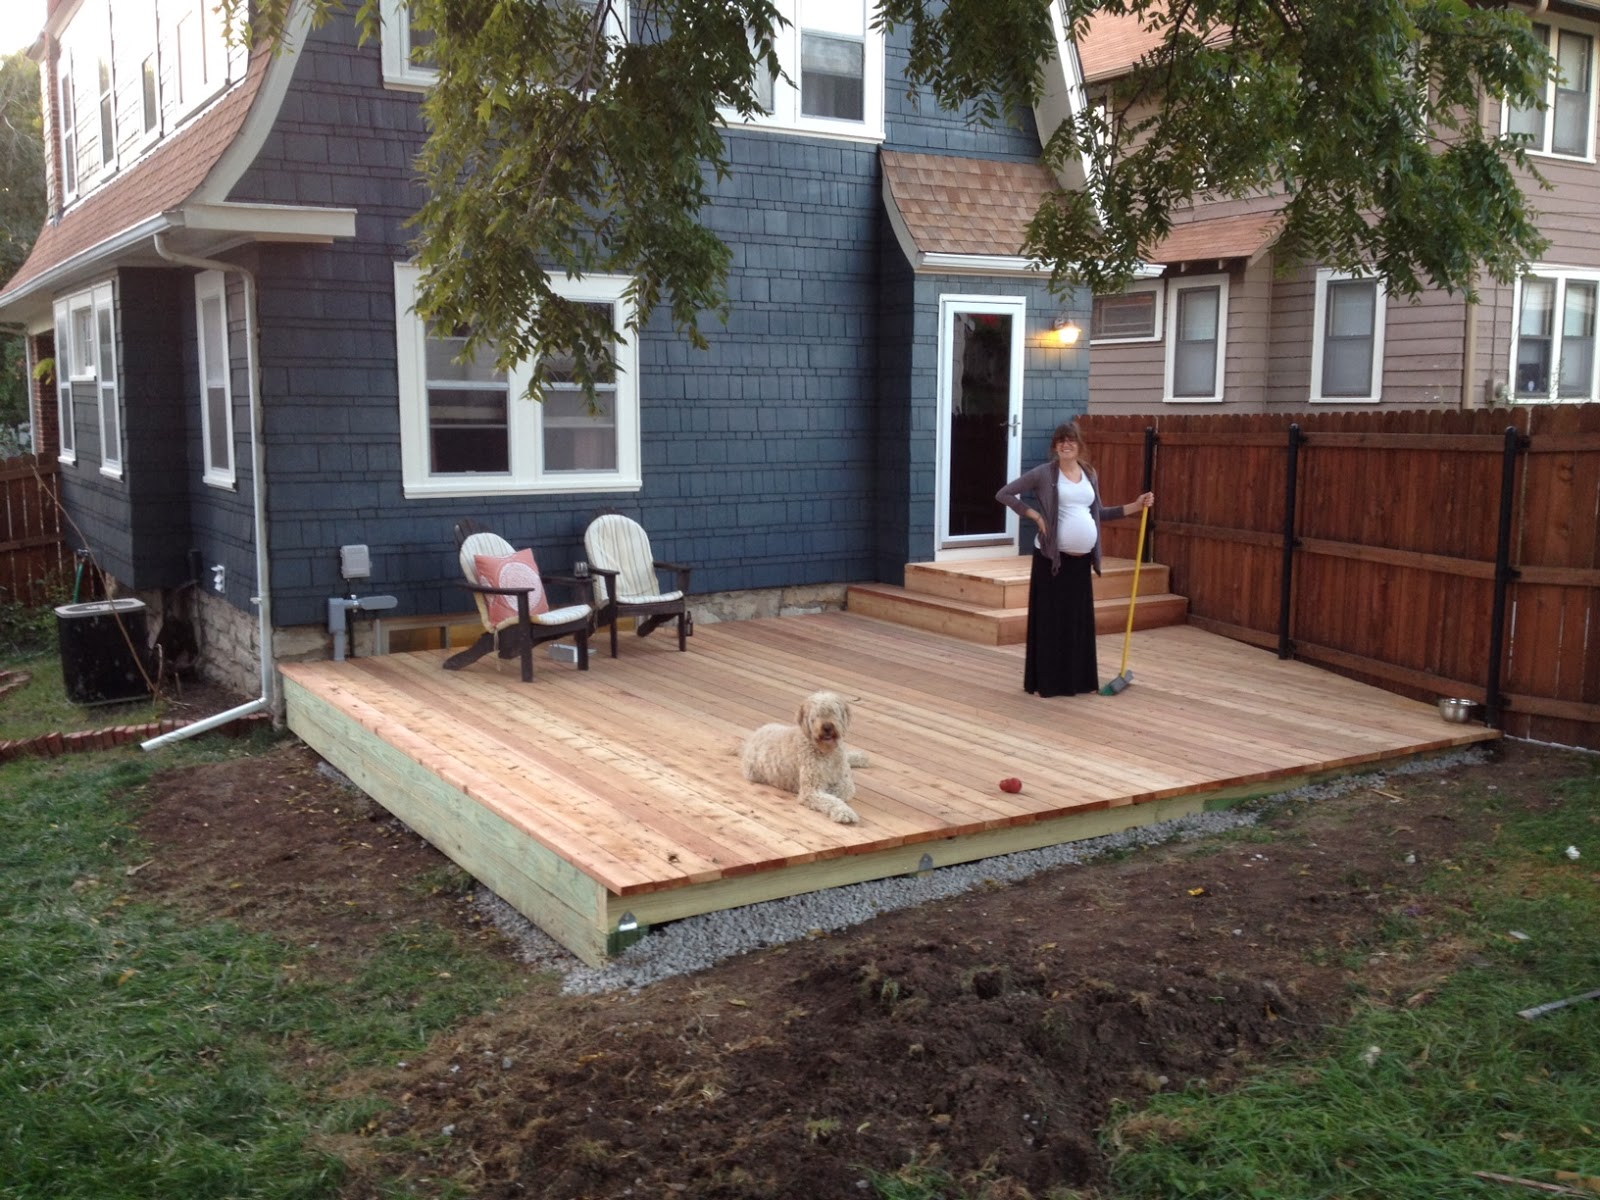
Decking added with dog and wife to test. Lots of extra dirt helped us grade our yard.
|
 |
| I used the "camo nailer" to hide our decking screws, and 18' planks so we didn't have any seams. I think they are liking the deck. |
 |
| Remember the concrete stoop? We built on top of it. |
 |
| I stained the deck with Penofin in their "Sierra" color. It also matches our fence. |
 |
| We moved our park bench to the top of the hill to break up the empty space out there. We painted it to match the Walnut tree leaves in October. |
 |
| Cedar fascia boards were added around the perimeter of the deck for a clean look. Sod added too. |