Tuesday, March 29, 2011

Between Four Ferns


Since Saturday afternoon, I've had four monstrous ferns in our basement while Kansas City experienced a very unusual late March snow storm. Today the weather has finally cleared to something resembling spring, so the ferns have found their place on our porch.


I love having these wild plants out there. They add such fun color and texture to the porch (which doubles as a living room/dining room/reading corner from April through October) and I think they're just the perfect accessory.

I wonder if our tenants from last year will be nesting with us again. . .

Sunday, March 27, 2011

How to: Homemade Cutting Boards: Part 1

Gluing up an oak and walnut cutting board

I am lucky to work with to an old college friend at my job. We're just figuring this out now, but we both have a passion for woodworking and all things diy.

The past week we have been chatting it up in the cube about meeting up to make some hardwood cutting boards. Orion made a trip to Schutte last Wednesday to pick up some oak and walnut, and we finally got rolling this Sunday.

The cutting boards are probably going to take 3 days to complete, just because there is alot of gluing, which takes a night to cure before moving to the next step, but eventually we will end up with some sweet checker board, endgrain up, cutting boards.

Here is the progress so far.

Orion chopping up the wood to 13" strips
Gluing up the strips face to face
Multiple clamps keep things square
View of end-grain, which will eventually be the top of the cutting boards 
Oak and walnut contrast nicely

Wednesday, March 23, 2011

Italia!

Remember the cool picture frames C made while I was out of town? Well, we've finally put them to use.

Here's our boring stairway wall before:


And here it is after:


Quite the improvement, don't you think?

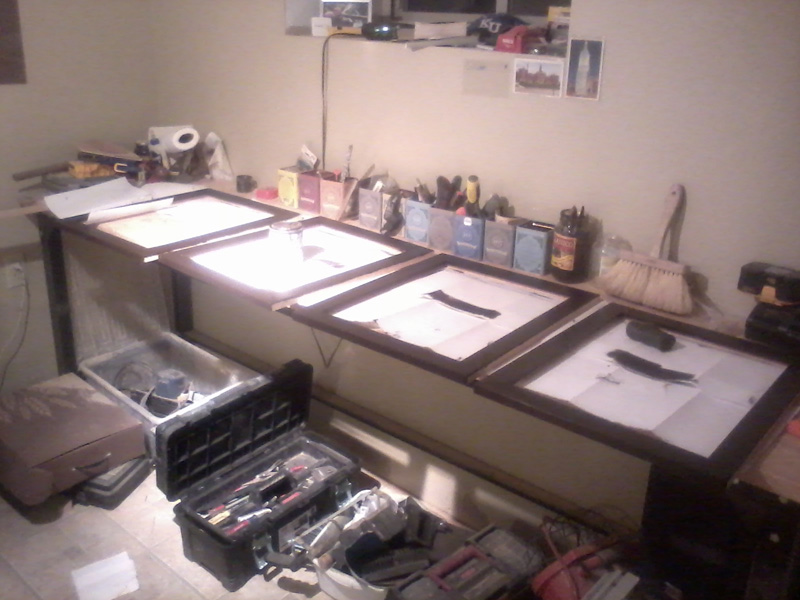
Chris built the frames to match the size we wanted for these prints, which came from a Paper Source calendar featuring vintage Italy travel ads. Total cost of the project is pretty cool:
- $25 calendar
- $25 for glass for the frames
- $0 for the reclaimed oak the frames are built from (yay for old stair treads!)
- $32 for 4 mats

Making a grand total of . . . . $82! If we consider the calendar used up for this project, that's only $20 and change per picture.

BUT . . . I have some plans for the remaining prints so let's count all twelve prints, taking our cost to . . . . $16 per picture! That's pretty hard to beat, and one of many reasons it's so nice to have a handy husband.

We've loved the Firenze print in particular ever since our honeymoon when we got to see Florence's amazing cathedral in person.


Ahh, memories . . . .

Anyway, our last step: painting the big white patch on the wall leftover from our messy plaster job a few months ago. Ugh, memories. I guess they can't all be good.

Tuesday, March 22, 2011

Grow


I saw this picture on a blog I follow, and couldn't help but think how amazing these letters, made of recycled misprinted soda, juice, and soup cans, would look on the back of the garage, facing the garden.

Do you think the plants would get the message?

Sunday, March 20, 2011

And the winner is . . . .

Arugula!


Just one week after dropping the seeds, it's my first thing to sprout in the garden beds. I think we have lots of good salads to look forward to this summer.

As we posted earlier this year, we finally got our steps to the garden in last fall, so I used our leftover stones from the rock wall to landscape in some flowerbeds near the wall. Our secret urban garden plan is nearly complete!


After 2010 backyard remodel


Before 2010 backyard remodel

I planted a few small perennials and lots of summer bulbs, and have a rose bush on the way. We also plan to add two small topiaries - one on each side of the steps - as an accent.


Saturday, March 19, 2011

Spring Forward!


Sorry for the blogging hiatus - C and I have both been traveling recently. I went to Michigan to visit my adorable nieces for a week, and C took a "business" trip to SXSW in Austin. We're back though, and very pleased to announce that Spring has arrived in Kansas City.

While I'm not quite ready to do much planting in the ground yet, I did go ahead and get started on our window boxes, which we built last spring. They're one of the few places I do annuals - most everything I plant in the ground is perennial to save time/money/digging in future years.

My impatiens last year found our boxes a bit too sunny - while they're under the porch roof, our house faces west and gets a few hours of really bright sunlight. So this year I switched to pansies:


and asparagus fern.


In another week or two I'll add some sweet potato vines and call them done!

Wednesday, March 9, 2011

Austin Design Scene


I'm sharing a collection of snapshots from my trip in Austin. I'm down here for a conference, but got a chance to visit some really cool parts of the city.

While I have visited Austin several times, this was the first time I got to spend some time exploring the unique shops on Congress St.

A few observations about downtown Austin.

It seems to be a mashup of creativity and commerce. Stylish boutiques with quirky wares pop up at almost every corner. Local restaurants and food trailers set themselves apart with great names and good signs — something you don't see everywhere. Even the antique stores show you how great merchandising can make a group of products desirable.

Antiques grouped by color look prettier

Fearless use of funky colors

Repetition and variation

Black and white + brown accent color build this arrangement

Boots will always be in style

Sign sold as fine art


Candy store

Switch plates


Famous antique store


Does Kansas City need an iconic T-Shirt


When you visit Austin, you see the phrase "Keep Austin Weird" plastered on shirts, store front windows and posters all over town. It's almost like saying "we know we are cool and we don't plan on changing any time soon."

I don't know if the people of Austin still like this shirt, but I've them everywhere for years, kinda like "I heart NY."

What exactly does "weird" mean? You would probably get different answers if you asked a group of Austiners. Regardless the exact interpretation, it remains a iconic statement of city pride.

My question is, does Kansas City need a shirt like this?

Assuming the answer is yes, what message could get Kansas Citians excited and united?

Maybe we don't need a shirt, but these are the things I think about. Surely we can do better than this.


Sunday, March 6, 2011

How to Make Custom Picture Frames from Reclaimed Wood


Reclaimed oak picture frames, 16" x 20".

We love artwork.

Particularly vintage travel posters. We often buy these posters cheap, but buying prints is the only easy part of the process. After you have a nice print, then it must be framed and matted (at least in our house).

$50-$200 dollars later, you have a nice piece ready to hang on your wall and an empty wallet.

Over time, I have realized we can't frame our art as fast as we buy it. It's just expensive enough to keep us from doing it often. We are left with rolled up artwork in our closets, only hoping to be hung some day.

Then the lightbulb.

Why buy $50 picture frames when you can make them practically for free?

In 2010, I removed fourteen 8"x 36" x 1" solid oak treads from our stairwell. I'm not really a pack rat, but knowing how much oak costs, I figured I would discover a way to revitalize them for later use.

The beauty of wood is that, when kept dry and indoors, it can last forever. It may look old and dirty, but if you take sawblade and sandpaper to its surface, it magically transforms before your eyes to something new and usable.

How You Do It:

Wood ripped to 1.75" x .75" sections via table saw. Make sure to remove any nails or other metal embedded in the wood before running through table saw.

Notch frame profile to allow for glass and art to rest on an inner corner

16" and 20" sections with mitered corners. Use a jig for consistent lengths.

Glue frames tight and square with ratcheting nylon strap. Clamp down frame faces to table.

Sand and finish with gel stain for smooth, dark walnut finish (or whatever you like)

Total cost: $25 (four glass panels).
Estimated cost at store: $160
Time: 4-8 hours (depending on finish style and quantity)


Gushy Design Footnote

If you have romantic notions towards oldness and history, then you probably "get" old homes and their allure. They have a story, a past, and the marks to show for it if you look close enough.

For this project, I left the old nail holes from the stairs visible on the new frames. Visible proof of their previous purpose and a new side note for home tours.

Restoration Hardware has mastered the shabby chic style with their furniture. I often visit their store for woodworking inspiration.

Now that blade and sandpaper has transformed these old steps to usable art boxes, they can once again reside in our stair well. This time a little lighter and a little taller.

Visible nail holes tell the story. Glass ordered and cut at Waldo hardware.

Art Tile Frame Inlay - Reclaimed wood

Archival Designs tile with oak frame for wall display.

Our neighbors are professional ceramicists. They make art out of clay on a daily basis. Really cool stuff - like wicked ornate backsplash relief tile landscapes. I admire their work and their dedication to the craft.

Fancy ceramic tile.

We recently purchase a humble little tile from their shop. Reminds me of Rome, which always makes me happy.

Theie tiles are dimensional and beautiful on their own, however, I have been on a framing kick of late, so I decided to make a frame for this beauty.

You can see how it all fits together below. Utilizing the table saw and reclaimed stair tread oak, this cost me nothing to make.

Only one step remains, where to hang it?

I made a 1/4" gap in the frame front to hold the tile inset and remain flush with the frame.


twitter test